How to Build an IoT Smart Parking System with Arduino & ESP32
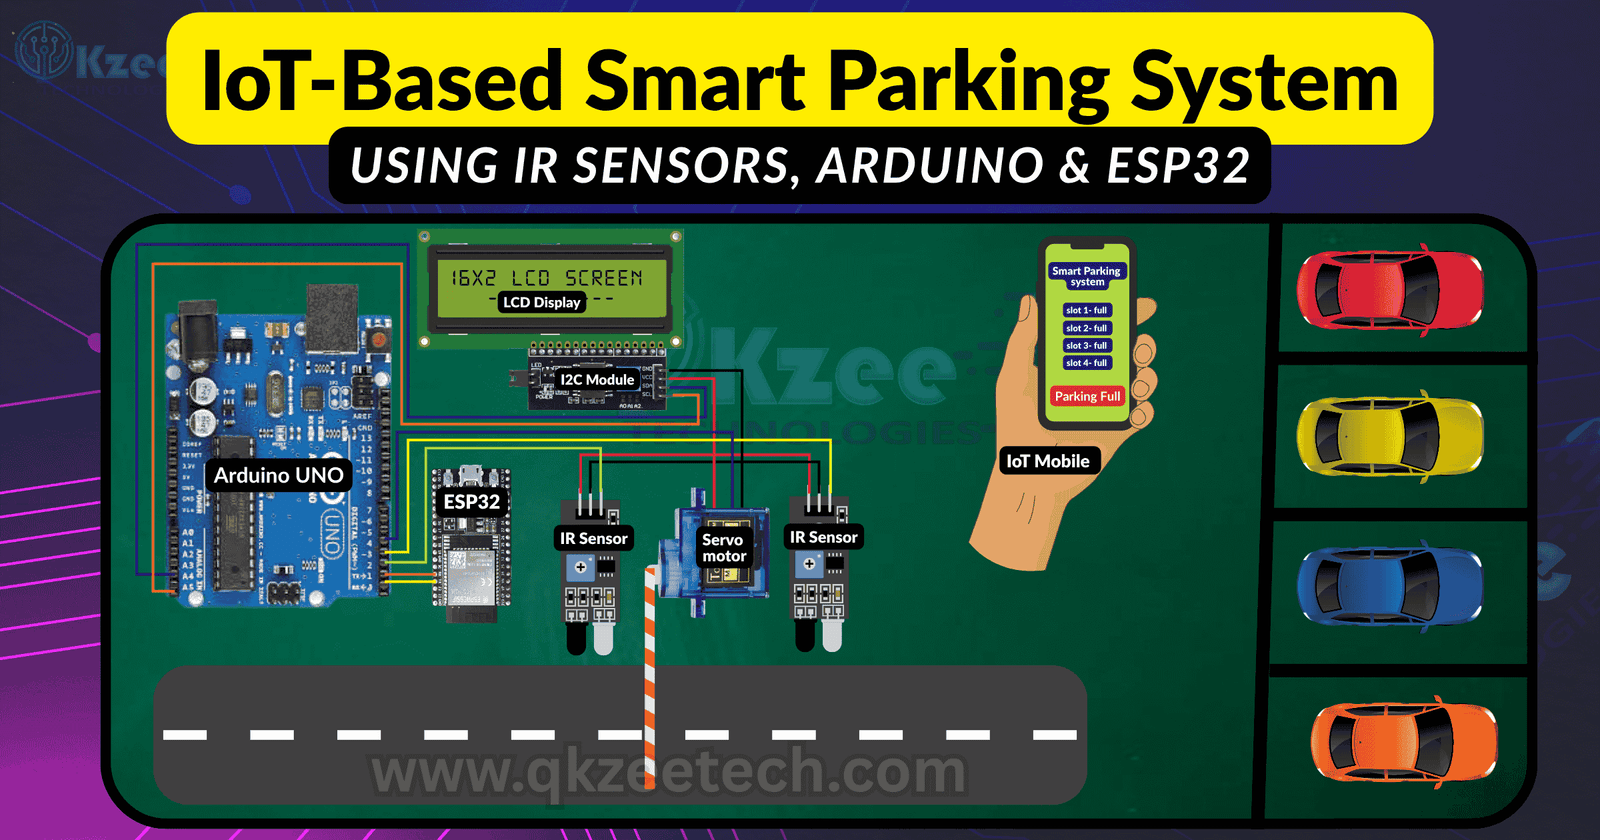
An IoT smart parking system uses connected sensors and microcontrollers to automatically detect available parking slots and show the count on a display and on a cloud dashboard. IR (infrared) obstacle sensors sit at the entry and exit gates: when a car blocks a sensor, the controller updates the free-slot count, opens the barrier gate, and sends the new count to the cloud. A driver can then check how many spaces are free before reaching the parking lot.
This guide builds the full system in two parts: an Arduino UNO reads the IR sensors, drives the servo gate and the LCD display, and an ESP32 sends the slot count to ThingSpeak over Wi-Fi. It is a popular final year project for students in Pakistan because it combines sensors, displays, motor control and IoT in one working model.

How the System Works
- Entry sensor — when a car arrives at the entry gate, the IR sensor detects it, the free-slot count drops by one, and the servo opens the barrier for a second.
- Exit sensor — when a car leaves through the exit gate, the count goes back up by one and the barrier opens again.
- Display — the 16×2 LCD always shows the free slots, or “PARKING FULL” when none are left.
- Cloud — the Arduino sends the count over serial to the ESP32, which uploads it to ThingSpeak. Anyone with the ThingSpeak link can see the parking availability online.
The count changes only when a car arrives at a sensor — not while it sits there. The sketch watches for the moment the sensor switches, so a car waiting at the gate is counted once, not again and again.
Main Components Needed
| Component | Price / link |
|---|---|
| Arduino UNO R3 DIP | Arduino UNO R3 DIP ATmega328P with USB Cable — Rs 1,200 |
| ESP32 development board (Wi-Fi + Bluetooth) | ESP32 30 Pin WiFi + Bluetooth Development Board — Rs 1,100 |
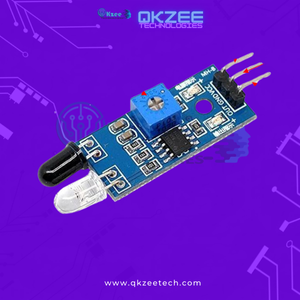
| IR obstacle sensor module × 2 (entry + exit) | IR Sensor Module — Infrared Obstacle Detection — Rs 115 each |
| SG90 micro servo motor (barrier gate) | SG90 9G Micro Servo Motor for Arduino & Robotics — Rs 300 |
| LCD1602 16×2 display with I2C module | LCD1602 16×2 Display with I2C Module — Rs 660 |
| MB102 breadboard (for testing on the bench) | MB102 Breadboard 830 Points — Rs 250 |
| 40-pin jumper wires | 40-Pin Jumper Wires 30cm — Rs 180 |
| 5V USB power supply / power bank | Use any 5V USB supply (no QKZEE listing) |
| Cardboard or foam board, toy cars | For the parking model base |
An ESP32-CAM can replace the plain ESP32 if you also want a camera at the gate — it is optional and there is no QKZEE listing for it; the build below uses the plain ESP32 board.
Wiring
IR Sensors → Arduino
| IR sensor pin | Arduino pin |
|---|---|
| Entry OUT | D2 |
| Exit OUT | D3 |
| Both VCC | 5V |
| Both GND | GND |
IR obstacle modules output LOW when they detect something in front of them. The sketch uses the Arduino’s internal pull-up resistors (INPUT_PULLUP), so no extra resistors are needed.
Servo Gate → Arduino
| Servo wire | Arduino pin |
|---|---|
| Signal (orange / yellow) | D4 |
| Power (red) | 5V |
| Ground (brown / black) | GND |
The small SG90 runs from the UNO’s 5V pin in this model. For a bigger servo, power it from a separate 5V 1A supply (join its GND to the Arduino GND) — the UNO’s 5V pin cannot feed a large servo.
LCD Display → Arduino
| LCD pin | Arduino pin |
|---|---|
| VCC | 5V |
| GND | GND |
| SDA | A4 |
| SCL | A5 |
The I2C LCD needs only two data wires (SDA/SCL) plus power. Its I2C address is usually 0x27 — if the display stays blank, try 0x3F (see Troubleshooting).
ESP32 Link → Arduino
| ESP32 pin | Arduino pin |
|---|---|
| RX2 (GPIO16) | UNO TX (D1) — through a 1k + 2k voltage divider |
| GND | UNO GND |
The UNO sends the slot count as a text line (slots:3) over its serial TX pin. The UNO’s TX is 5V, but the ESP32 RX2 pin is 3.3V logic — the divider is required: UNO TX → 1k resistor → ESP32 RX2, and ESP32 RX2 → 2k resistor → GND. Join the grounds: without a common GND the serial link will not work. The ESP32 is powered by its own USB 5V cable.
All modules share the 5V + GND rails on the breadboard.
Required Libraries
Install this one from the Arduino IDE Library Manager (Sketch → Include Library → Manage Libraries):
- LiquidCrystal I2C by Frank de Brabander
Servo and Wire are built into the Arduino IDE — no install needed. On the ESP32 side, WiFi is built into the ESP32 board package.
Complete Arduino Code
/*
  IoT Smart Parking — ARDUINO UNO side
  Reads two IR sensors (entry D2, exit D3), drives the servo gate (D4)
  and the I2C LCD, and sends the slot count to the ESP32 as "slots:N".
  The count changes only when a car ARRIVES at a sensor (edge detection),
  so a car waiting at the gate is counted once, not again and again.
  Servo: 0 = gate open, 100 = gate closed.
*/

#include <Servo.h>
#include <Wire.h>
#include <LiquidCrystal_I2C.h>

LiquidCrystal_I2C lcd(0x27, 16, 2);   // I2C address 0x27 (try 0x3F if blank)
Servo gateServo;

const int irEntry = 2;
const int irExit = 3;
const int TOTAL_SLOTS = 4;

int slots = TOTAL_SLOTS;
bool entryWasLow = false;
bool exitWasLow = false;

void setup() {
  Serial.begin(9600);
  pinMode(irEntry, INPUT_PULLUP);
  pinMode(irExit, INPUT_PULLUP);
  gateServo.attach(4);
  gateServo.write(100);   // gate closed
  lcd.init();
  lcd.backlight();
  updateDisplay();
  sendSlots();
}

void loop() {
  bool entryLow = digitalRead(irEntry) == LOW;
  bool exitLow = digitalRead(irExit) == LOW;

  // Car just arrived at the entry gate
  if (entryLow && !entryWasLow) {
    if (slots > 0) {
      slots--;
      openGate();
    } else {
      Serial.println("Parking Full");
    }
    updateDisplay();
    sendSlots();
  }

  // Car just arrived at the exit gate
  if (exitLow && !exitWasLow) {
    if (slots < TOTAL_SLOTS) slots++;
    openGate();
    updateDisplay();
    sendSlots();
  }

  entryWasLow = entryLow;
  exitWasLow = exitLow;
  delay(50);
}

void openGate() {
  gateServo.write(0);     // open
  delay(1000);
  gateServo.write(100);   // close
}

void updateDisplay() {
  lcd.clear();
  lcd.setCursor(0, 0);
  if (slots == 0) {
    lcd.print("PARKING FULL");
  } else {
    lcd.print("Slots free: ");
    lcd.print(slots);
  }
  lcd.setCursor(0, 1);
  lcd.print("Smart Parking");
}

void sendSlots() {
  Serial.print("slots:");
  Serial.println(slots);
}
Complete ESP32 Code (ThingSpeak)
/*
  IoT Smart Parking — ESP32 side
  Receives "slots:N" lines from the Arduino on Serial2 (RX2 = GPIO16)
  and uploads the slot count to ThingSpeak field1 over Wi-Fi.
  Arduino TX (5V) -> 1k + 2k divider -> ESP32 RX2 (3.3V). Common GND.
*/

#include <WiFi.h>

const char* ssid = "Your_SSID";
const char* password = "Your_PASS";
const char* host = "api.thingspeak.com";
String apiKey = "YOUR_API_KEY";

void setup() {
  Serial.begin(9600);   // USB monitor
  Serial2.begin(9600, SERIAL_8N1, 16, 17);   // RX2 = GPIO16 from Arduino TX
  WiFi.begin(ssid, password);
  while (WiFi.status() != WL_CONNECTED) {
    delay(500);
  }
}

void loop() {
  if (Serial2.available()) {
    String data = Serial2.readStringUntil('\n');
    data.trim();
    if (data.startsWith("slots:")) {
      int slots = data.substring(6).toInt();
      sendToThingSpeak(slots);
    }
  }
}

void sendToThingSpeak(int slots) {
  if (WiFi.status() != WL_CONNECTED) return;
  WiFiClient client;
  if (!client.connect(host, 80)) return;
  String url = "/update?api_key=" + apiKey + "&field1=" + String(slots);
  client.print(String("GET ") + url + " HTTP/1.1\r\n" +
               "Host: " + host + "\r\n" +
               "Connection: close\r\n\r\n");
  client.stop();
}
What the Code Does
- The Arduino sketch reads both IR sensors every 50 ms and reacts only to the moment a sensor switches from HIGH to LOW — that is one car arriving. A car sitting in front of a sensor does not keep changing the count.
- On entry with a free slot, the count drops, the gate opens for one second and closes. On entry with no free slot, the gate stays shut and the serial monitor prints “Parking Full”.
- The LCD always shows the free slots, or “PARKING FULL” on the first line.
- After every change, the Arduino sends one line —
slots:3, for example — over serial. The ESP32 reads that line on Serial2, takes the number afterslots:, and sends it to ThingSpeak field1 with a plain HTTP GET request. You can watch the count rise and fall on your ThingSpeak channel chart. - The Arduino’s Serial goes to the USB monitor AND to the ESP32 at the same time, so the Serial Monitor still shows the
slots:Nlines while the system runs.
How to Make the Parking Model
Step 1: Build the Model Base
Cut a parking lot from cardboard or foam board with 4 marked slots, an entry lane and an exit lane. Mount the two IR sensors at the entry and exit gates, facing across the lane so a passing car breaks the beam.
Step 2: Mount the Gate
Fix the SG90 servo at the entry gate with a small cardboard barrier arm on its horn. At 0° the arm is up (open), at 100° it is down (closed).
Step 3: Wire the Modules
Wire the sensors, servo, LCD and ESP32 link as in the tables above. Join all grounds together. Fit the 1k + 2k divider between the UNO TX and the ESP32 RX2.
Step 4: Upload Both Sketches
Upload the Arduino sketch to the UNO and the ESP32 sketch to the ESP32 board. Put your own Wi-Fi name, password and ThingSpeak API key in the ESP32 sketch first (create a free ThingSpeak account and channel with one field).
Step 5: Test with a Toy Car
Push a toy car through the entry gate and watch the LCD count drop and the gate open. Push it out through the exit gate and watch the count rise. Check the ThingSpeak chart updates too.
Testing the System
- Test the sensors first. Open the Serial Monitor at 9600 baud and wave your hand in front of the entry sensor — the monitor should print
slots:3and the LCD should show “Slots free: 3”. If nothing happens, check the sensor wiring and that its onboard LED changes when you block it. - Test the gate. On entry the servo should swing open for one second and close. If it only twitches, its power is too weak — give it a separate 5V supply.
- Test the exit. Trigger the exit sensor — the count should rise by one and the gate should open. If it rises past 4, the edge detection is working but the cap is wrong — check
slots < TOTAL_SLOTS. - Test the cloud. Open your ThingSpeak channel after a few cars — field1 should plot the slot count over time. If the chart stays flat, check the ESP32 Wi-Fi connection and the API key.
Troubleshooting
- LCD shows nothing: check the I2C address — most modules use
0x27, some use0x3F. Change the address in the sketch. Also check SDA → A4 and SCL → A5, and that the backlight is on. - Sensor never triggers: the IR module’s onboard LED should change when you block it. If it does not, adjust the small potentiometer on the module (sensitivity) and check VCC is 5V.
- Count drops again and again while a car waits at the gate: the edge detection is not running — check that
entryWasLow/exitWasLoware updated at the end ofloop()as in the sketch above. - Gate opens but the count does not change: the Arduino is not sending, or the ESP32 is not receiving. Check the divider (UNO TX → 1k → ESP32 RX2, RX2 → 2k → GND) and the common GND. The Serial Monitor should show
slots:Nlines — if it does, the Arduino side is fine and the fault is on the ESP32 side. - ThingSpeak never updates: check the Wi-Fi name and password, the API key, and that the ESP32 is connected (add a
Serial.println(WiFi.localIP())after the connection loop to confirm). ThingSpeak’s free account allows one update every 15 seconds — faster updates are ignored. - Servo only twitches: it needs more current than the UNO’s 5V pin can give. Power it from a separate 5V 1A supply and join the grounds.
Applications
- School and college projects — sensors, display, motor control and IoT in one build.
- Final year projects — a live cloud dashboard is easy to demonstrate to judges.
- Smart-city demos — shows how a real parking system counts and reports spaces.
- A base for your own version — add a slot sensor per parking bay, an RFID entry, or a buzzer when the lot is full.
Where to Buy the Components
The Arduino UNO, ESP32 board, IR sensors, SG90 servo, I2C LCD, breadboard and jumper wires are available at QKZEE Technologies, Shop 20, 1st Floor, Al-Khalil Center, Hall Road, Lahore, and online at qkzeetech.com with delivery all over Pakistan — see the links above. A 5V USB power supply is not listed on the shop — any phone charger or power bank works.
Still Stuck?
If the count does not change, or ThingSpeak never updates, message us — tell us what the Serial Monitor shows and which step you are on, and we will help you find the fault.
FAQs
Why two boards — can the ESP32 do everything alone?
Yes — the ESP32 has enough GPIO and Wi-Fi built in, so a single-board version is possible and simpler. This guide keeps the two-board design because the Arduino handles the sensors, servo and LCD while the ESP32 handles only the cloud, which is easier to debug one part at a time.
Why does the count change only when a car arrives, not while it waits?
The sketch uses edge detection: it reacts only to the moment the sensor switches from HIGH to LOW. Without it, a car waiting at the gate would be counted again every 50 ms.
What is the 1k + 2k divider for?
The Arduino TX pin sends 5V, but the ESP32 RX2 pin is 3.3V logic. The divider drops the signal to about 3.3V. Without it the ESP32 may read garbage or be damaged over time.
Do I need a ThingSpeak account?
Only for the cloud part. The parking system — sensors, gate, LCD — works fully without it. Create a free ThingSpeak account and channel (one field) only when you want the online dashboard.
Can I add one sensor per parking slot?
Yes. Give each slot its own IR sensor on its own digital pin, count how many read LOW, and show that as the occupied count. The entry/exit gate logic stays the same.
Why is the gate closed at 100° and open at 0°?
That is the convention used in this sketch — the servo horn’s rest position is 100° (arm down). If your barrier arm sits the other way, swap the two angles.
Conclusion
Building an IoT smart parking system brings together IR sensing, a servo gate, an LCD display and cloud reporting in one project. Wire the sensors on D2/D3, the servo on D4, the LCD on A4/A5, link the ESP32 through the divider, upload both sketches, and test it with a toy car before showing it to anyone. With the code in this guide, students in Pakistan can demonstrate a working system and explain every part of it — from the sensor beam to the ThingSpeak chart — to their teachers and judges.