

Arduino UNO R3 DIP ATmega328P with USB Cable – Lahore, Pakistan
₨1,380 Original price was: ₨1,380.₨1,200Current price is: ₨1,200.
you can payment online thorugh Easypaisa, jazzcash, Raast
Cash on Delivery All over Pakistan
Direct Bank Transfer Payments
🚚 Delivery: Rs 350 all over Pakistan — 3 to 4 working days. Cash on Delivery available. Order on WhatsApp: +92-302-8577025 / +92-336-4459320
About this item
- Robust DIP ATmega328P: Ensures durable and consistent performance.
- Ready Out-of-the-Box: Includes a USB cable for immediate project start-up.
- QKZee Technologies: Your trusted provider of quality electronics in Lahore.
- Student-Friendly: Ideal for educational purposes and final-year projects.
- DIY Compatible: A versatile tool for any DIY electronics enthusiast.
What is the Arduino UNO?
The Arduino UNO is the standard beginner board for learning electronics and Arduino programming in Pakistan — and this is the DIP version, built around the ATmega328P microcontroller. It is the board almost every student starts with, and the board most tutorials, books and final-year projects are written for.
DIP means the ATmega328P chip sits in a socket on the board instead of being soldered down. If you ever damage the chip, you replace just the chip — not the whole board. That is the practical advantage of this version over the SMD kit, where the chip is soldered to the board.
Key Specifications
| Specification | Value |
|---|---|
| Microcontroller | ATmega328P (DIP, removable) |
| Operating voltage | 5V |
| Input voltage (recommended) | 7–12V |
| Input voltage (limits) | 6–20V |
| Digital I/O pins | 14 (of which 6 provide PWM output) |
| Analog input pins | 6 |
| DC current per I/O pin | 40 mA |
| DC current for 3.3V pin | 50 mA |
| Flash memory | 32 KB (ATmega328P), of which 0.5 KB used by bootloader |
| SRAM | 2 KB (ATmega328P) |
| EEPROM | 1 KB (ATmega328P) |
| Clock speed | 16 MHz |
| Built-in LED | LED_BUILTIN — pin 13 |
| Programming | USB connection, ICSP header for advanced programming |
| Reset | Dedicated reset button on the board |
First Upload — Blink in 6 Steps
The Blink sketch is the perfect first test: it turns the small built-in LED (marked L) on for one second, then off for one second, again and again. No wiring is needed — the LED is already on the board.
- Connect the board: plug the UNO into your computer with the USB cable. The green power LED (marked ON) should light up. Use a data USB cable — a charge-only cable cannot upload code.
- Select board and port: in Arduino IDE, select Arduino Uno and the port your board is connected to (on Windows it looks like COM3, COM4, etc.). If no port appears, you probably need the CH340 USB driver first.
- Open Blink: go to File > Examples > 01.Basics > Blink.
- Verify: click the Verify button (the checkmark icon). The IDE compiles the sketch — wait for it to finish without errors.
- Upload: click the Upload button (the right-arrow icon). The TX and RX LEDs blink rapidly — that is normal. Wait for “Done uploading”. Do not unplug the board while uploading.
- Check the result: the small orange LED (marked L) starts blinking — one second on, one second off. That blinking LED is your proof: the code is now inside the board, and the board keeps running it even if you unplug it and power it separately.
Arduino Code — Blink
// Blink — turns the built-in LED on pin 13 on and off
void setup() {
  pinMode(LED_BUILTIN, OUTPUT);
}
void loop() {
  digitalWrite(LED_BUILTIN, HIGH);
  delay(1000);
  digitalWrite(LED_BUILTIN, LOW);
  delay(1000);
}
For the full step-by-step guide with screenshots and error fixes, see our How to Upload Code in Arduino UNO guide. If you have not installed the IDE yet, start with our How to Download Arduino IDE guide.
First Sensor — HC-SR04 Wiring
| HC-SR04 Pin | Arduino UNO Pin |
|---|---|
| VCC | 5V |
| TRIG | D9 |
| ECHO | D10 |
| GND | GND |
Four wires, no resistor needed. With this wiring and the code on our HC-SR04 sensor page, your UNO can measure distance — the first step toward robot obstacle avoidance. For advanced work with a bare chip, see our How to Burn Bootloader on ATmega328 with Arduino UNO guide.
Where to Use It
- Learning Arduino: the board every beginner tutorial assumes — if a guide says “Arduino”, it usually means this board.
- Robot cars and line followers: pair it with an L298N motor driver and an HC-SR04 and you have a robot.
- Home automation and sensor projects: temperature, humidity, motion, light and water-level projects all start here.
- School, college and final-year projects: the safe choice for FYPs — examiners, supervisors and parts shops all know this board.
What You Get
1 × Arduino UNO R3 DIP board (ATmega328P) with USB cable, tested before dispatch. The USB cable is included in the box, so you can start your first upload straight away.
Frequently Asked Questions
Q1: Do I need Arduino IDE installed before uploading code?
Yes. Uploading is done from inside Arduino IDE. If you have not installed it yet, follow our guide: How to Download Arduino IDE.
Q2: Which board should I select in the IDE?
Arduino Uno (under Arduino AVR Boards). Selecting the wrong board is the most common cause of upload errors.
Q3: My board is connected but no port appears — what do I do?
Install the CH340 USB driver — many UNO boards sold in Pakistan use the CH340 USB chip. After installing the driver, unplug the board, plug it back in, and the port will appear. Also check that your cable is a data cable, not a charge-only cable.
Q4: What does the “not in sync” / timeout error during upload mean?
Usually the wrong board or wrong port is selected — re-check both. Also press the reset button on the board once and try uploading again.
Complete Your Project
- HC-SR04 Ultrasonic Sensor — Rs 200
- MB102 Breadboard — Rs 250
- 40-Pin Jumper Wires — Rs 180
- LCD1602 Display with I2C Module — Rs 660
- Active Buzzer — Rs 35
- SG90 9g Micro Servo Motor — Rs 300
Delivery across Pakistan — flat Rs 350, 3–4 working days, Cash on Delivery available. Questions? Message us on WhatsApp at +92-302-8577025.
Customer Reviews
Related products
-
Sale!

HC-06 Bluetooth Module (Serial Port) for Arduino Wireless Communication Projects – Lahore’s Best Price
₨830Original price was: ₨830.₨720Current price is: ₨720. -
Sale!
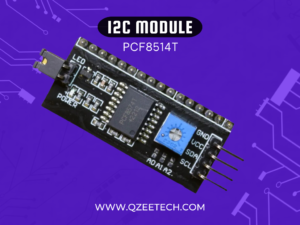
I2C/IIC Module for LCD Displays Serial Interface Adapter PCF8514T – Best Price in Hall Road Lahore, Pakistan
₨205Original price was: ₨205.₨180Current price is: ₨180. -
Sale!

L298N Dual H-Bridge Motor Driver Best Price in Lahore, Pakistan
₨430Original price was: ₨430.₨375Current price is: ₨375. -
Sale!
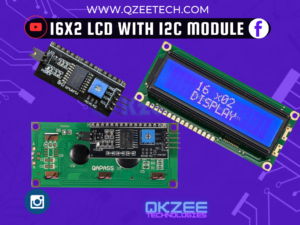
LCD1602 16×2 Display with I2C Module Perfect Combo for Makers Best Price in Lahore, Pakistan
₨760Original price was: ₨760.₨660Current price is: ₨660.
Reviews
There are no reviews yet.