
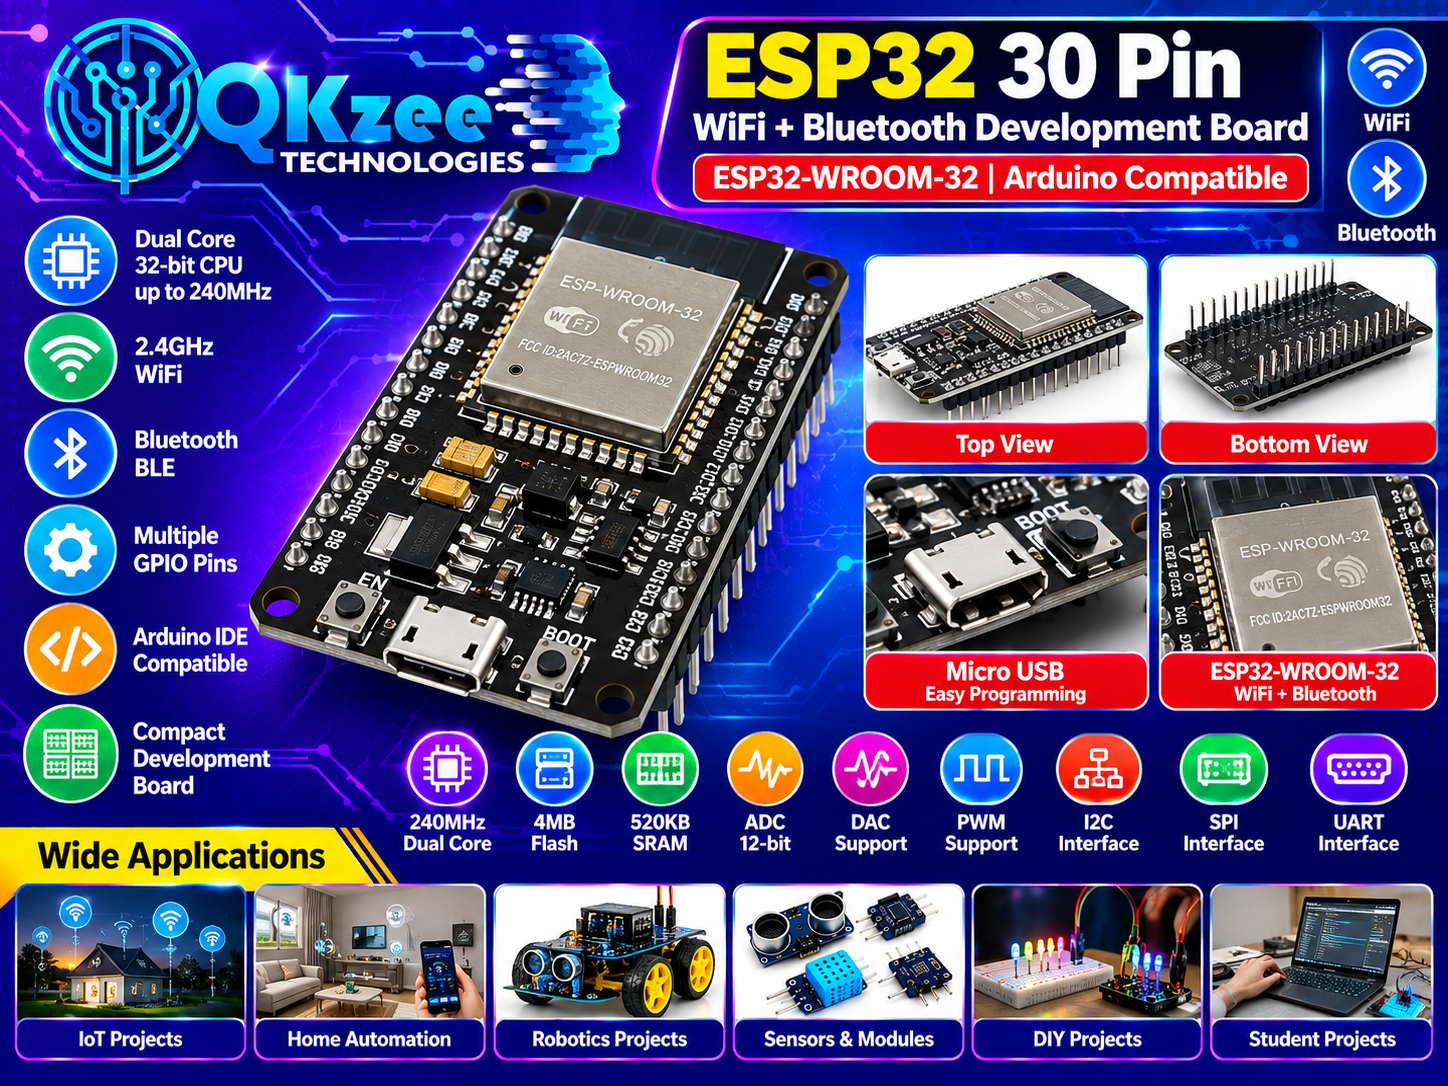
ESP32 30 Pin WiFi + Bluetooth Development Board – ESP32-WROOM-32 for Arduino, IoT & Robotics
₨1,265 Original price was: ₨1,265.₨1,100Current price is: ₨1,100.
you can payment online thorugh Easypaisa, jazzcash, Raast
Cash on Delivery All over Pakistan
Direct Bank Transfer Payments
🚚 Delivery: Rs 350 all over Pakistan — 3 to 4 working days. Cash on Delivery available. Order on WhatsApp: +92-302-8577025 / +92-336-4459320
About this item
Key Features
- ESP32-WROOM-32 based development board
- 30-pin development board
- Built-in 2.4GHz WiFi
- Built-in Bluetooth / Bluetooth Low Energy
- Dual-core 32-bit processor
- Up to 240MHz clock speed on common ESP32-WROOM-32 boards
- Up to 520KB SRAM
- Typically 4MB Flash on common development-board versions
- Multiple GPIO pins
- ADC and DAC support
- PWM output
- I2C interface
- SPI interface
- UART serial communication
- Arduino IDE compatible
- USB programming interface
- Compact development-board design
- Suitable for breadboard prototyping
- Excellent for IoT and wireless projects
Common 30-pin ESP32 boards sold in Pakistan are listed with 4MB flash, 520KB SRAM, WiFi 802.11 b/g/n and Bluetooth 4.2/BLE, although exact specifications can vary between board versions.
Full Product Description
ESP32 30 Pin WiFi + Bluetooth Development Board
The ESP32 30 Pin WiFi + Bluetooth Development Board is a powerful and versatile microcontroller board designed for IoT, wireless communication, robotics, automation and embedded electronics projects.
Based on the popular ESP32-WROOM-32 platform, this development board combines processing power with built-in 2.4GHz WiFi and Bluetooth connectivity, making it an excellent choice for projects that need wireless control, cloud connectivity, sensor monitoring or remote communication.
The ESP32 can be programmed using the Arduino IDE, making it a popular upgrade from traditional Arduino boards for projects requiring WiFi and Bluetooth. It is also suitable for development with other supported environments such as ESP-IDF and MicroPython, depending on the board/module configuration. PakModules
With multiple GPIO pins and support for common interfaces such as ADC, DAC, PWM, I2C, SPI and UART, the ESP32 can connect to a wide range of sensors, displays, motors, relay modules and other electronic components. GitHub
Why Choose ESP32?
Compared with basic microcontroller boards, the ESP32 is particularly useful when your project needs wireless connectivity. It can be used to build WiFi-enabled sensors, smart home systems, Bluetooth controllers, IoT monitoring systems, robots and automation projects.
Key Features
- ESP32-WROOM-32 based development board
- 30-pin development board
- Built-in 2.4GHz WiFi
- Built-in Bluetooth / Bluetooth Low Energy
- Dual-core 32-bit processor
- Up to 240MHz clock speed on common ESP32-WROOM-32 boards
- Up to 520KB SRAM
- Typically 4MB Flash on common development-board versions
- Multiple GPIO pins
- ADC and DAC support
- PWM output
- I2C interface
- SPI interface
- UART serial communication
- Arduino IDE compatible
- USB programming interface
- Compact development-board design
- Suitable for breadboard prototyping
- Excellent for IoT and wireless projects
Common 30-pin ESP32 boards sold in Pakistan are listed with 4MB flash, 520KB SRAM, WiFi 802.11 b/g/n and Bluetooth 4.2/BLE, although exact specifications can vary between board versions. PakModules
Technical Specifications
| Specification | Details |
|---|---|
| Product Type | ESP32 Development Board |
| Module | ESP32-WROOM-32 |
| Board Version | 30 Pin |
| Processor | 32-bit Xtensa LX6 Dual-Core |
| Maximum Clock | Up to 240MHz |
| WiFi | 2.4GHz 802.11 b/g/n |
| Bluetooth | Bluetooth + BLE |
| Flash Memory | Typically 4MB |
| SRAM | Up to 520KB |
| GPIO | Multiple programmable GPIO pins |
| ADC | 12-bit ADC |
| DAC | Available on supported GPIOs |
| PWM | Supported |
| I2C | Supported |
| SPI | Supported |
| UART | Supported |
| Programming | USB |
| Logic Voltage | 3.3V |
| Development Environment | Arduino IDE, ESP-IDF, MicroPython* |
| Application | IoT, Robotics, Automation, Smart Home |
| Board Type | Development / Prototyping Board |
*Software support can depend on the exact ESP32 variant and development environment.
ESP32 Pin & Interface Support
The ESP32 provides a wide range of interfaces for connecting electronic components.
Digital GPIO
Use GPIO pins to control:
- LEDs
- Relays
- Buzzers
- Motors through drivers
- Servos
- Buttons
- Digital sensors
Analog Input
ESP32 ADC pins can be used for reading analog sensors such as:
- LDR
- Gas sensors
- Soil moisture sensors
- Potentiometers
- Voltage sensors
- Analog temperature sensors
I2C
Connect modules such as:
- 16×2 I2C LCD
- 20×4 I2C LCD
- OLED displays
- BME280
- BMP280
- MPU6050
- BH1750
- Other I2C sensors
SPI
Suitable for:
- Displays
- SD cards
- RFID modules
- Communication modules
- Other SPI peripherals
UART
Useful for:
- GPS modules
- GSM modules
- Bluetooth modules
- Serial sensors
- Other UART devices
Applications
The ESP32 30 Pin Development Board is suitable for a wide range of electronics and engineering projects.
IoT Projects
Build internet-connected devices such as:
- IoT temperature monitoring
- Humidity monitoring
- Air quality monitoring
- Energy monitoring
- Remote sensor systems
- Cloud-connected devices
Home Automation
Use ESP32 for:
- Smart lights
- Smart switches
- WiFi relay control
- Appliance automation
- Door monitoring
- Smart security systems
Robotics
The ESP32 can be used as the controller for:
- Bluetooth robotic cars
- WiFi robotic cars
- Obstacle avoidance robots
- Line-following robots
- Smart robots
- Remote-controlled vehicles
Sensor Projects
Connect sensors such as:
- DHT11 / DHT22
- BME280
- BMP280
- MQ-2
- MQ-135
- LDR
- HC-SR04
- PIR
- MPU6050
- MAX30102
- DS18B20
- Soil moisture sensors
Smart Agriculture
Suitable for:
- Soil moisture monitoring
- Automatic irrigation
- Temperature monitoring
- Humidity monitoring
- Water-level monitoring
- Remote farm monitoring
Student & University Projects
The ESP32 is suitable for:
- FYP projects
- Engineering projects
- IoT projects
- Robotics projects
- Embedded systems
- Electronics projects
- STEM projects
- University prototypes
Compatible Components
The ESP32 can be used with many common electronic modules, including:
Sensors:
DHT11, DHT22, BME280, BMP280, MQ-2, MQ-135, HC-SR04, PIR, LDR, MPU6050, MAX30102 and more.
Displays:
OLED, I2C LCD, TFT displays and LED displays.
Modules:
Relay modules, RFID modules, GPS modules, GSM modules, motor drivers, SD card modules and other development modules.
Actuators:
Servo motors, DC motors, stepper motors, pumps, buzzers and relays through suitable driver circuits.
Arduino IDE Compatibility
The ESP32 is widely used with the Arduino IDE, allowing users familiar with Arduino programming to develop ESP32 projects using a familiar environment. Pakistani product listings also commonly market ESP32 boards specifically for Arduino IDE projects. PakModules
This makes it suitable for both beginners and experienced developers working on:
Arduino → ESP32 → IoT → WiFi → Bluetooth → Automation
Ideal For
✅ Electronics Students
✅ Engineering Students
✅ Arduino Users
✅ IoT Developers
✅ Robotics Engineers
✅ Makers & Hobbyists
✅ STEM Projects
✅ University FYP Projects
✅ Home Automation
✅ Industrial Automation Prototypes
✅ Wireless Sensor Projects
What’s Included
1 × ESP32 30 Pin WiFi + Bluetooth Development Board
USB cable: Not included unless specifically mentioned in the selected product variant/package.
First Test — WiFiScan
The fastest way to prove your ESP32 works is the WiFiScan example: it scans for WiFi networks around the board and prints them in the Serial Monitor. If it lists networks, your board, your USB connection and your IDE setup are all working.
- Add the board URL: in Arduino IDE, go to File > Preferences and paste this URL into the “Additional boards manager URLs” field, then click OK:
https://espressif.github.io/arduino-esp32/package_esp32_index.json - Install the ESP32 package: open the Boards Manager, type
esp32in the search box, find “esp32 by Espressif Systems” and click Install. The download is about 50 MB, so give it a few minutes on a slow connection. - Select your board: in the board selector dropdown, choose ESP32 Dev Board — the correct choice for the common 30-pin ESP32-WROOM-32 development board. Then select the port your board is connected to.
- Open WiFiScan: go to File > Examples > WiFi > WiFiScan.
- Upload: click the Upload button and wait for “Done uploading”. Do not unplug the board while uploading.
- Open the Serial Monitor: set the baud rate to 115200 — the WiFiScan sketch prints at this speed, so the monitor must match it. Press the EN (Enable) button on your board to restart it. The Serial Monitor will show the list of WiFi networks found near your board.
For the full step-by-step guide with screenshots and error fixes, see our How to Install ESP32 Board in Arduino IDE guide.
Arduino Code — Blink (GPIO 2)
// Blink — onboard LED on GPIO 2 (common 30-pin ESP32 board)
void setup() {
  pinMode(2, OUTPUT);
}
void loop() {
  digitalWrite(2, HIGH);
  delay(1000);
  digitalWrite(2, LOW);
  delay(1000);
}
Upload it the same way as the WiFiScan test. If the LED does not blink, check that you selected ESP32 Dev Board and the right port — and remember the 3.3V warning below before wiring anything else to the board.
Important — 3.3V Logic, Not 5V
The ESP32 runs on 3.3V logic — not 5V like the Arduino UNO and Nano. Do not feed 5V into a GPIO pin: a 5V signal on an ESP32 input can damage the pin. Sensors and modules that output 5V signals need a level shifter (or a voltage divider) before connecting to the ESP32. Power the board itself through its USB port, and use its 3.3V pin for 3.3V modules.
Frequently Asked Questions
Q1: Upload fails with “Failed to connect to ESP32: Timed out waiting for packet header” — what do I do?
The board is not in flashing/uploading mode. Hold down the BOOT button on your board, click Upload in the IDE, and release the BOOT button as soon as you see the “Connecting…” message. After “Done uploading”, press the EN button to restart the board. Many newer boards enter flashing mode automatically, so you may never need this step.
Q2: COM port not found / not available — what do I do?
Install the right USB driver for your board’s USB chip: the CP210x USB to UART Bridge drivers from Silicon Labs for CP2102 boards, or the CH340 driver for CH340 boards. Then try another USB port, and confirm your cable is a data cable, not a charge-only cable.
Q3: Which board should I select in the IDE?
ESP32 Dev Board — the correct choice for the common 30-pin ESP32-WROOM-32 development board. If your board is a different variant, select its matching name instead (for example ESP32-C3 Dev Board or ESP32-S3 Dev Board).
Q4: The Serial Monitor shows nothing (or garbage) after uploading WiFiScan — why?
The baud rate must be 115200 — the WiFiScan sketch prints at this speed, so the monitor must match it. Set it in the Serial Monitor’s baud dropdown, then press the EN button on the board to restart it.
Complete Your Project
- DHT11 Temperature & Humidity Sensor — Rs 215
- HC-SR04 Ultrasonic Sensor — Rs 200
- 1-Channel Relay Module 5V — Rs 155
- LCD1602 Display with I2C Module — Rs 660
- 40-Pin Jumper Wires — Rs 180
- MB102 Breadboard — Rs 250
Delivery across Pakistan — flat Rs 350, 3–4 working days, Cash on Delivery available. Questions? Message us on WhatsApp at +92-302-8577025.
Customer Reviews
Related products
-
Sale!
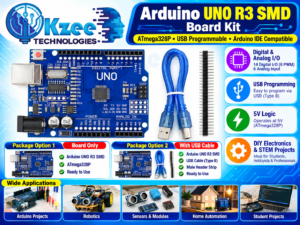
Arduino Uno R3 SMD Board Kit – With or Without USB Cable
₨1,050 – ₨1,250Price range: ₨1,050 through ₨1,250Add to Cart This product has multiple variants. The options may be chosen on the product page -
Sale!

Buy Arduino Starter Kit UNO DIP in Lahore, Pakistan – Best Price for Beginners & DIY Projects
₨7,475Original price was: ₨7,475.₨6,500Current price is: ₨6,500. -
Sale!
Buy Arduino Starter Kit UNO SMD in Lahore, Pakistan – Best Price for Beginners & DIY Projects
₨6,900Original price was: ₨6,900.₨6,000Current price is: ₨6,000. -
Sale!
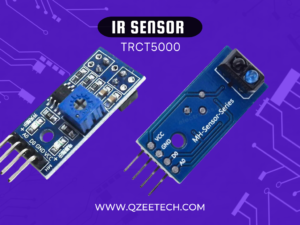
TCRT5000 Line Tracking Sensor Module for Arduino in Lahore, Pakistan
₨150Original price was: ₨150.₨130Current price is: ₨130.
Reviews
There are no reviews yet.