- +92-302-8577025
- qkzeetech@gmail.com
- shop 20, 1st floor Al-khalil Center Hall Road , Lahore
Setting up an IR (Infrared) receiver and remote with an Arduino is one of the most exciting and practical DIY tasks you can do as a beginner or a student working on final year projects, science exhibitions or engineering automation systems. This project is widely used across universities in Pakistan, especially for students from technical colleges and schools who aim to create smart control systems, remote-controlled home automation and Arduino-based student projects.
In this complete guide, we'll explore the step-by-step setup of an IR receiver and remote with Arduino, using easy-to-find components from Hall Road, Lahore, or online at QKZEE Technologies.
Infrared (IR) remote controls are widely used in home appliances, automation and DIY electronics. In this guide, we'll show you how to interface an IR receiver (KY-022) with an Arduino to decode signals from any IR remote. This project is perfect for:
Whether you're a student in Pakistan or a DIY electronics lover, this step-by-step tutorial will help you build a functional IR remote control system easily.
| Component | Model / Specification | Purpose |
|---|---|---|
| Arduino Board | Arduino UNO R3 DIP (UNO, Nano or Mega) | Main microcontroller — Rs 1,200 |
| IR Receiver (KY-022) | VS1838B (common model) | Receives IR signals — available on order, message us on WhatsApp |
| IR Remote Control | Any standard TV/DVD remote | Transmits IR codes — available on order, message us on WhatsApp |
| Breadboard & Jumper Wires | Jumper wires + MB102 breadboard | Circuit connections — Rs 180 / Rs 250 |
| LED (Optional) | 5mm LED (any colour) | Visual feedback — Rs 6 |
| Resistor (220Ω) | For LED current limiting | Protects LED — available on order, message us on WhatsApp |
| Relay module (optional, for appliances) | 1-channel relay module | Switches lights/fans with IR — Rs 155 |
| NodeMCU (optional, for Wi-Fi) | ESP8266 NodeMCU | Wi-Fi control instead of IR — Rs 590 |
The KY-022 IR receiver has 3 pins:
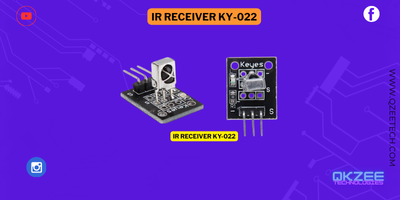
| Connection | Where it goes |
|---|---|
| KY-022 VCC | Arduino 5V |
| KY-022 GND | Arduino GND |
| KY-022 OUT | Arduino D11 |
| LED anode (+) via 220Ω resistor | Arduino D13 |
| LED cathode (−) | Arduino GND |

⚠️ The old code will NOT compile with the library you install today — read this before you upload. The old code used the IRremote v2 API (IRrecv, decode_results, irrecv.decode(&results)). That API was removed in IRremote v3 (2021), so the code fails with the current library. The complete program below uses the current v3/v4 API (IRremote.hpp, IrReceiver, decodedIRData). The old code also had a delay(1000) after every received signal, which blocked the receiver for a full second — that is removed.
#include <IRremote.hpp>

const int RECV_PIN = 11;

void setup() {
  Serial.begin(9600);
  // ENABLE_LED_FEEDBACK blinks the built-in LED on pin 13 on every received signal
  IrReceiver.begin(RECV_PIN, ENABLE_LED_FEEDBACK);
}

void loop() {
  if (IrReceiver.decode()) {
    Serial.println(IrReceiver.decodedIRData.decodedRawData, HEX);  // print the HEX code
    IrReceiver.resume();   // ready for the next signal
  }
}
FFA25D).Each button on your remote sends a different HEX code. Write them down — you will use them in the next step to make each button do something (for example, one button for the light, one for the fan). See our Arduino IR remote control project for a full example that switches appliances with those codes.
Use a relay module to switch lights, fans or TVs with IR signals. See our home automation system with Arduino — it uses the same relay wiring, and you can trigger the relays from the HEX codes you recorded above instead of from Bluetooth.
Program an Arduino + IR LED to mimic remote signals.
Integrate with smart home systems using NodeMCU or Raspberry Pi.
This IR Remote & Receiver (KY-022) setup is a simple yet powerful project for:
Start experimenting today and unlock wireless control for your Arduino projects!
The Arduino UNO (Rs 1,200), 5mm LED (Rs 6), 1-channel relay module (Rs 155), NodeMCU (Rs 590), jumper wires (Rs 180) and MB102 breadboard (Rs 250) are available at QKZEE Technologies, Shop 20, 1st Floor, Al-Khalil Center, Hall Road, Lahore, and online at qkzeetech.com with delivery all over Pakistan — see the links above. The KY-022 IR receiver module, an IR remote and the 220Ω resistor are available on order — message us on WhatsApp and we will arrange them for you.
If no HEX code appears in the Serial Monitor, or the LED never blinks, message us — tell us which library version you installed, what the Serial Monitor shows, and whether the receiver's OUT pin is on D11, and we will help you find the fault.
Message us on WhatsAppWatch on YouTube
Why does the old code give an error like "'decode_results' was not declared"?
The old code uses the IRremote v2 API (IRrecv, decode_results). That API was removed in IRremote v3. Install the current library and use the v3 code in this guide (IRremote.hpp, IrReceiver, decodedIRData).
Why does my remote work but show a different HEX code each time?
Some remotes send a repeat code while a button is held down, and a few protocols include a toggle bit that flips on every press. Press and release the button once, and use the first code you see. If the code keeps changing, try another remote.
Can I use a different pin instead of D11?
Yes — any digital pin works. Change RECV_PIN in the code to match the pin you wired OUT to.
Do I need the 220Ω resistor for the LED?
Yes — always put a resistor in series with an LED. Without it, the LED draws too much current and burns out (and can damage the Arduino pin). See our breadboard tutorial for the full explanation.
Can I control a fan or light with the remote?
Yes — connect a relay module (LIVE to COM, appliance to NO) and switch the relay when the code for your chosen button arrives. See our home automation guide for the relay wiring.
Will any TV remote work?
Almost any infrared remote works — TV, DVD, air conditioner. The receiver only needs the 38kHz modulated signal, which nearly all IR remotes use.
An IR receiver with an Arduino is one of the best first wireless projects: three wires, one library and any TV remote. Remember the two things that trip everyone up — use the current IRremote v3 code (the old v2 API no longer compiles), and write down the HEX code for each button before you build anything on top of it. That is the whole project, and it works.