- +92-302-8577025
- qkzeetech@gmail.com
- shop 20, 1st floor Al-khalil Center Hall Road , Lahore
An obstacle avoidance robot car is a small smart vehicle that drives on its own. It uses an ultrasonic sensor to detect an obstacle in front of it, then reverses and turns away before hitting it. No remote control is needed — the Arduino decides what to do.
This guide is written for students and beginners in Pakistan. It covers everything in order: the parts you need, the wiring, the Arduino code, and how to test the car. If you are building your first robot, this is a good place to start.
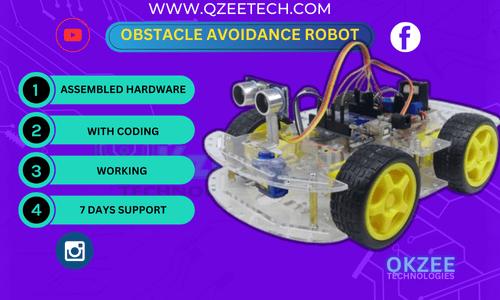
All parts are available from the QKZEE Technologies shop on Hall Road, Lahore, and online.
| Component | What it does | Price |
|---|---|---|
| Arduino UNO R3 DIP ATmega328P with USB Cable | The brain of the robot — runs the code | Rs 1,200 |
| L298N Dual H-Bridge Motor Driver | Drives the motors, controls direction and speed | Rs 375 |
| HC-SR04 Ultrasonic Sensor | Detects obstacles by measuring distance | Rs 200 |
| 4WD Smart Robot Car Chassis Kit for Arduino | Chassis with 4 motors and wheels | Rs 1,925 |
| 40-Pin Dupont Jumper Wires | All the connections | Rs 180 |
| Battery pack 6V–12V (for example 2 × 18650 cells with a Single Cell 18650 Battery Holder) | Powers the motors | Holder Rs 45 |
Want the finished car instead of building it? The Obstacle Avoidance Robot Car Complete Assembled Kit is available ready-made for Rs 9,000.
The HC-SR04 ultrasonic sensor sends out sound pulses and listens for the echo. The Arduino measures how long the echo takes and converts that time into a distance.
The code checks the distance again and again while the car drives:
That is the whole idea. The car never needs to touch the obstacle — it reacts before it reaches it.
The L298N sits between the Arduino and the motors. The Arduino only sends small control signals; the L298N handles the motor power.
| L298N pin | Connect to |
|---|---|
| IN1 | Arduino pin 8 |
| IN2 | Arduino pin 9 |
| IN3 | Arduino pin 10 |
| IN4 | Arduino pin 11 |
| ENA, ENB | Jumpers ON (full speed) |
| OUT1, OUT2 | Left-side motors |
| OUT3, OUT4 | Right-side motors |
| 12V, GND | Battery pack 6V–12V |
| GND | Arduino GND (common ground — this wire is essential) |
Two things beginners often miss: first, the L298N GND and the Arduino GND must be connected together, or the motors will not respond at all. Second, never power the motors from the Arduino 5V pin — the motors draw far more current than the Arduino can supply. The battery pack powers the motors through the L298N.
While testing, power the Arduino from USB. On the finished car, the L298N 5V output can power the Arduino.
| HC-SR04 pin | Connect to |
|---|---|
| VCC | Arduino 5V |
| GND | Arduino GND |
| Trig | Arduino pin 12 |
| Echo | Arduino pin 13 |
Mount the sensor at the front of the chassis, facing forward, with nothing blocking it. The two “eyes” (transmitter and receiver) must point at the road ahead.
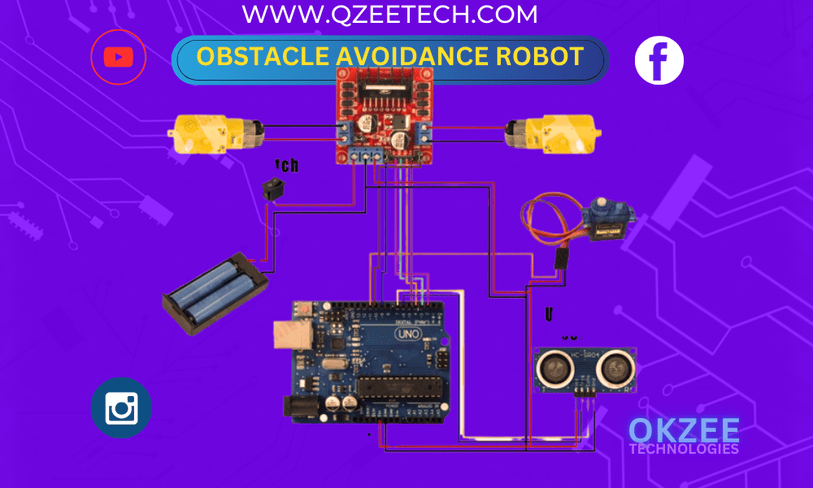
Below is the complete code. It reads the distance from the ultrasonic sensor and adjusts the motors. Upload it with the Arduino IDE — if you have not uploaded code before, see How to Upload Code in Arduino UNO.
#define trigPin 12
#define echoPin 13
#define in1 8
#define in2 9
#define in3 10
#define in4 11

long duration;
int distance;

void setup() {
  pinMode(trigPin, OUTPUT);
  pinMode(echoPin, INPUT);
  pinMode(in1, OUTPUT);
  pinMode(in2, OUTPUT);
  pinMode(in3, OUTPUT);
  pinMode(in4, OUTPUT);
  Serial.begin(9600);
}

void loop() {
  // Send a pulse to the ultrasonic sensor
  digitalWrite(trigPin, LOW);
  delayMicroseconds(2);
  digitalWrite(trigPin, HIGH);
  delayMicroseconds(10);
  digitalWrite(trigPin, LOW);

  // Measure the time for the echo
  duration = pulseIn(echoPin, HIGH);

  // Calculate the distance
  distance = duration * 0.034 / 2;
  Serial.println(distance);  // see the live distance in Serial Monitor

  // If an obstacle is detected within 20 cm
  if (distance < 20) {
    // Move backward
    digitalWrite(in1, LOW);
    digitalWrite(in2, HIGH);
    digitalWrite(in3, LOW);
    digitalWrite(in4, HIGH);
    delay(500);  // Reverse for half a second

    // Then turn left
    digitalWrite(in1, LOW);
    digitalWrite(in2, HIGH);
    digitalWrite(in3, HIGH);
    digitalWrite(in4, LOW);
    delay(500);  // Turn left for half a second
  } else {
    // Move forward
    digitalWrite(in1, HIGH);
    digitalWrite(in2, LOW);
    digitalWrite(in3, HIGH);
    digitalWrite(in4, LOW);
  }
}
The pins in the code match the wiring tables above exactly: Trig 12, Echo 13, IN1–IN4 on pins 8–11. If you change any wire, change the matching number in the code.
20 in if (distance < 20) — a bigger number makes it turn sooner. If it turns too little, increase the two delay(500) values.Robot not moving at all? Check the battery is charged, the L298N GND is connected to the Arduino GND, and the ENA/ENB jumpers are ON.
Robot moves backwards when it should go forward? Swap the two wires of one motor pair on the L298N output.
Sensor not detecting obstacles? Check Trig is on pin 12 and Echo on pin 13, the sensor faces forward with a clear view, and watch the distance in Serial Monitor.
Car turns the wrong way? Swap the wires of one motor pair, or swap the left and right motor connections on OUT1/OUT2 and OUT3/OUT4.
Car stops or resets when the motors start? The battery is too weak for four motors. Use a fresh, fully charged 6V–12V pack.
If your robot car still does not work after checking the wiring and the code, message us — tell us what the car does and what the Serial Monitor shows, and we will help you find the fault.
Chat on WhatsAppWatch on YouTube
Which Arduino board do I need for this robot car?
An Arduino UNO R3 — the DIP version with USB cable is used in this guide. Any genuine UNO works, because the code only uses pins 8 to 13.
Can I use a different motor driver instead of the L298N?
You can, but the wiring and the code would change. This guide is written for the L298N, so use it if you are following the steps exactly.
Why does my car turn the wrong way?
The left and right motors are swapped, or one motor pair is wired in reverse. Swap the two wires of one motor pair on the L298N output and test again.
How far can the HC-SR04 sensor detect?
Reliably from about 2 cm to about 200 cm in front of the car. This project reacts at 20 cm, which is a good balance for a small, slow robot car.
What battery should I use?
A 6V to 12V pack — for example two 18650 cells (7.4V) in holders. Do not power the motors from the Arduino 5V pin.
Can I buy this robot car ready-made?
Yes. The complete assembled kit is available for Rs 9,000 from the QKZEE shop — see the parts table above.
All the parts in this guide — Arduino UNO, L298N, HC-SR04, 4WD chassis, jumper wires and battery holders — are available at QKZEE Technologies, Shop 20, 1st Floor, Al-Khalil Center, Hall Road, Lahore, and online at qkzeetech.com with delivery all over Pakistan. The complete assembled kit is also available if you want the finished car.
Building an obstacle avoidance robot car is a fantastic way to learn robotics, coding and electronics in one project. You have wired a motor driver, connected an ultrasonic sensor, and written code that lets a machine react to the world around it. Once it works, try changing the 20 cm distance or the turn time and see how the car behaves — that is how you start learning robotics for real.