Interfacing MAX30102 Pulse Oximeter & Heart Rate Sensor with Arduino

Interfacing MAX30102 Pulse Oximeter & Heart Rate Sensor with Arduino: A Complete DIY Guide
1. Introduction
In today’s health-conscious world, monitoring vital signs like heart rate and blood oxygen levels has become increasingly important. The MAX30102 sensor, when combined with an Arduino, offers a cost-effective solution for creating personal health monitoring devices. This guide will walk you through the process of interfacing the MAX30102 Pulse Oximeter and Heart Rate Sensor with an Arduino, making it an ideal project for students, hobbyists, and professionals alike.
2. What is the MAX30102 Sensor?
The MAX30102 is an integrated pulse oximetry and heart-rate monitor biosensor module. It combines two LEDs (infrared and red), a photodetector, optimized optics, and low-noise analog signal processing to detect pulse oximetry and heart-rate signals. Designed for wearable health devices, it’s compact and efficient.

3. Key Features and Specifications
Power Supply: 1.8V (core) and 3.3V (LEDs)
Operating Voltage: 1.8V to 3.3V
Current Consumption: 600µA (measurement mode), 0.7µA (standby)
Communication Interface: I2C
Integrated Temperature Sensor: For ambient temperature compensation
Dimensions: 14mm x 18mm
4. Applications of MAX30102
Wearable Health Devices: Smartwatches and fitness bands
Medical Monitoring: Portable pulse oximeters
DIY Projects: Health monitoring systems for students and hobbyists
Academic Projects: Ideal for final year projects in engineering and medical fields
5. Required Components
To get started, you’ll need the following components:
MAX30102 Sensor Module
Arduino Uno or compatible board
OLED Display (optional)
Jumper Wires
Breadboard
6. Understanding the Pinout
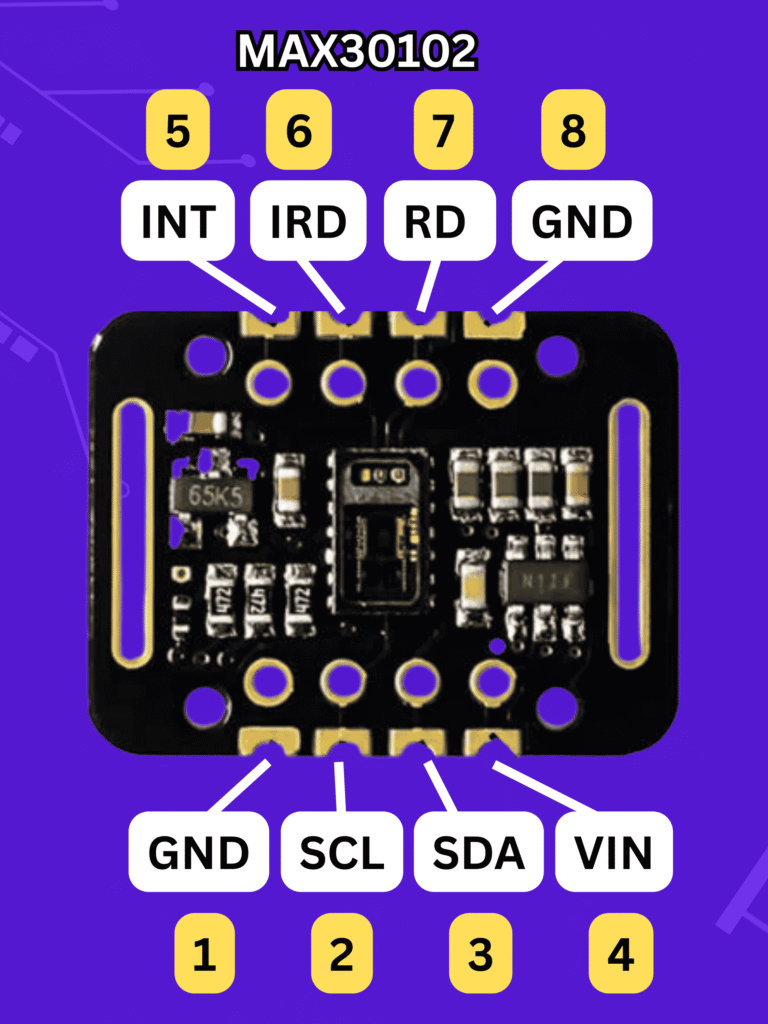
The MAX30102 module typically has the following pins:
VIN: Power supply (1.8V to 3.3V)
GND: Ground
SCL: I2C Clock
SDA: I2C Data
INT: Interrupt (optional)
Ensure you connect these pins correctly to your Arduino to avoid any issues.
7. How the MAX30102 Works
The MAX30102 operates by emitting light from its LEDs into the skin and measuring the amount of light that is either absorbed or reflected to its photodetector. The varying light absorption corresponds to the pulsing of blood through the body, allowing the sensor to determine heart rate and blood oxygen levels.
8. Wiring the MAX30102 with Arduino
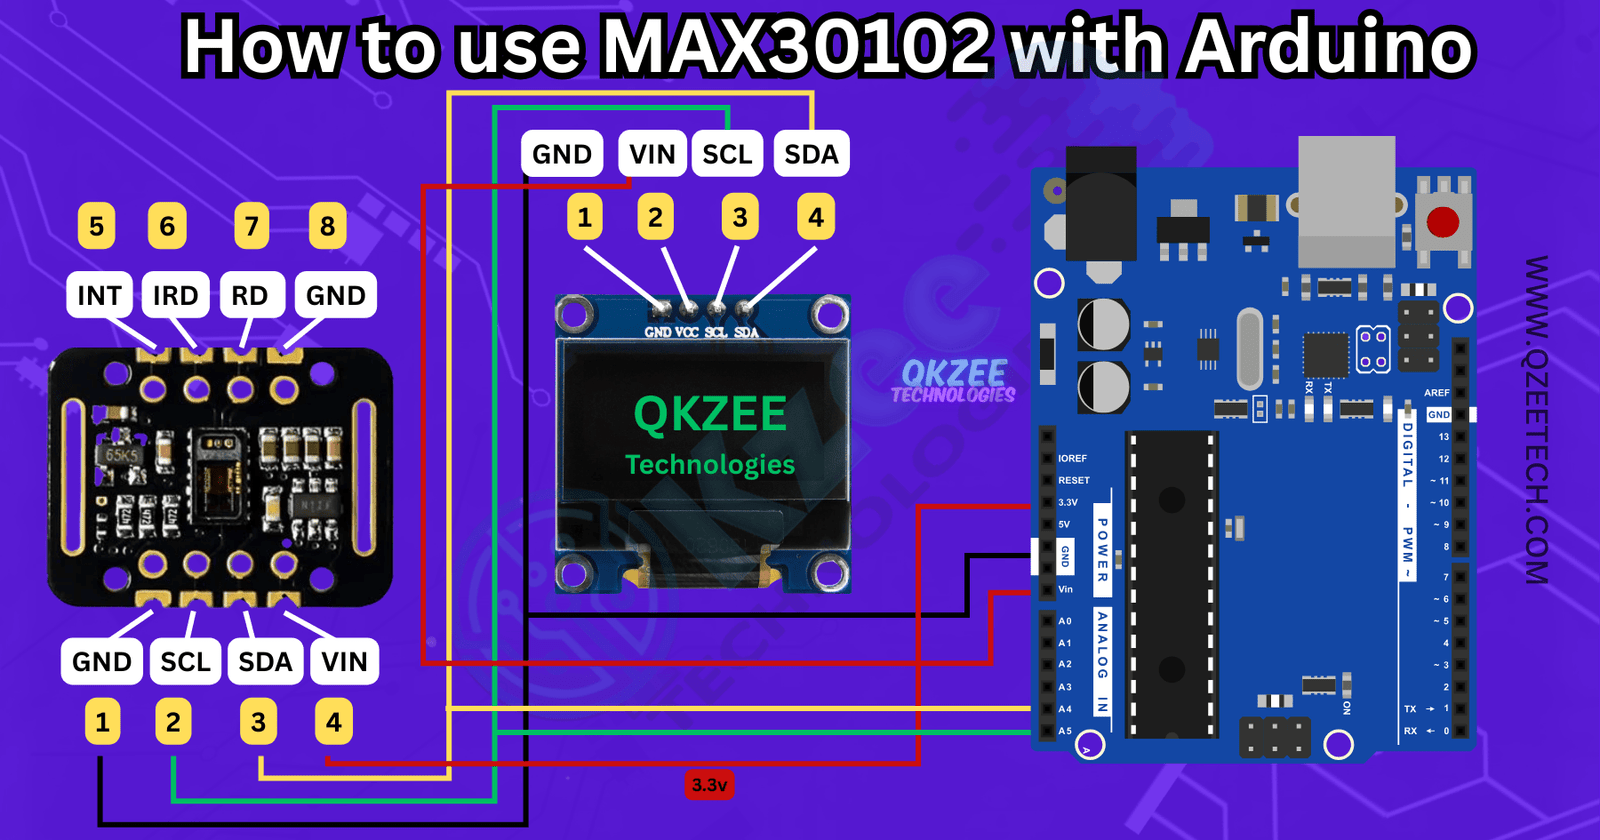
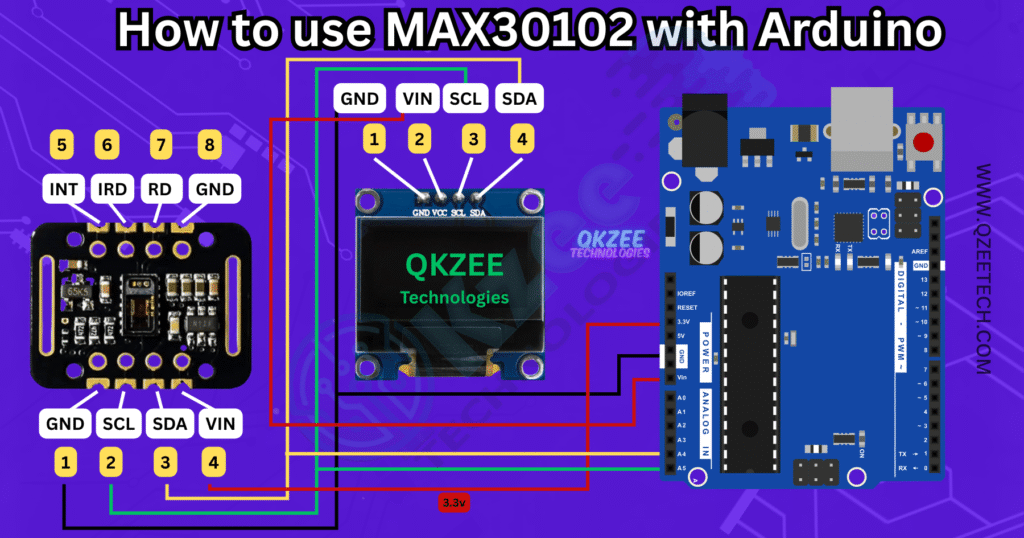
Here’s how to connect the MAX30102 to the Arduino Uno:
MAX30102 VIN → Arduino 3.3V
MAX30102 GND → Arduino GND
MAX30102 SCL → Arduino A5
MAX30102 SDA → Arduino A4
MAX30102 INT → Arduino D2 (optional)
Ensure all connections are secure to prevent any communication issues.

9. Installing Necessary Libraries
Before coding, install the required libraries:
Open the Arduino IDE.
Go to Sketch > Include Library > Manage Libraries.
Search for and install:
MAX3010x by SparkFun
Adafruit GFX Library (if using OLED)
Adafruit SSD1306 (if using OLED)
These libraries provide functions to interface with the MAX30102 and display data easily.
10. Arduino Code for MAX30102
Here’s a basic code snippet to read data from the MAX30102:
#include <Wire.h>
#include "MAX30105.h"
#include "heartRate.h"
MAX30105 particleSensor;
void setup() {
Serial.begin(115200);
if (!particleSensor.begin(Wire, I2C_SPEED_STANDARD)) {
Serial.println(“MAX30102 not found. Check wiring/power.”);
while (1);
}
particleSensor.setup();
particleSensor.setPulseAmplitudeRed(0x0A);
particleSensor.setPulseAmplitudeIR(0x0A);
}
void loop() {
  long irValue = particleSensor.getIR();
  Serial.print("IR: ");
  Serial.println(irValue);
  delay(1000);
}
This code initializes the sensor and prints the infrared value, which correlates with heart rate.
11. Displaying Data on OLED
To enhance your project, you can display the readings on an OLED screen:
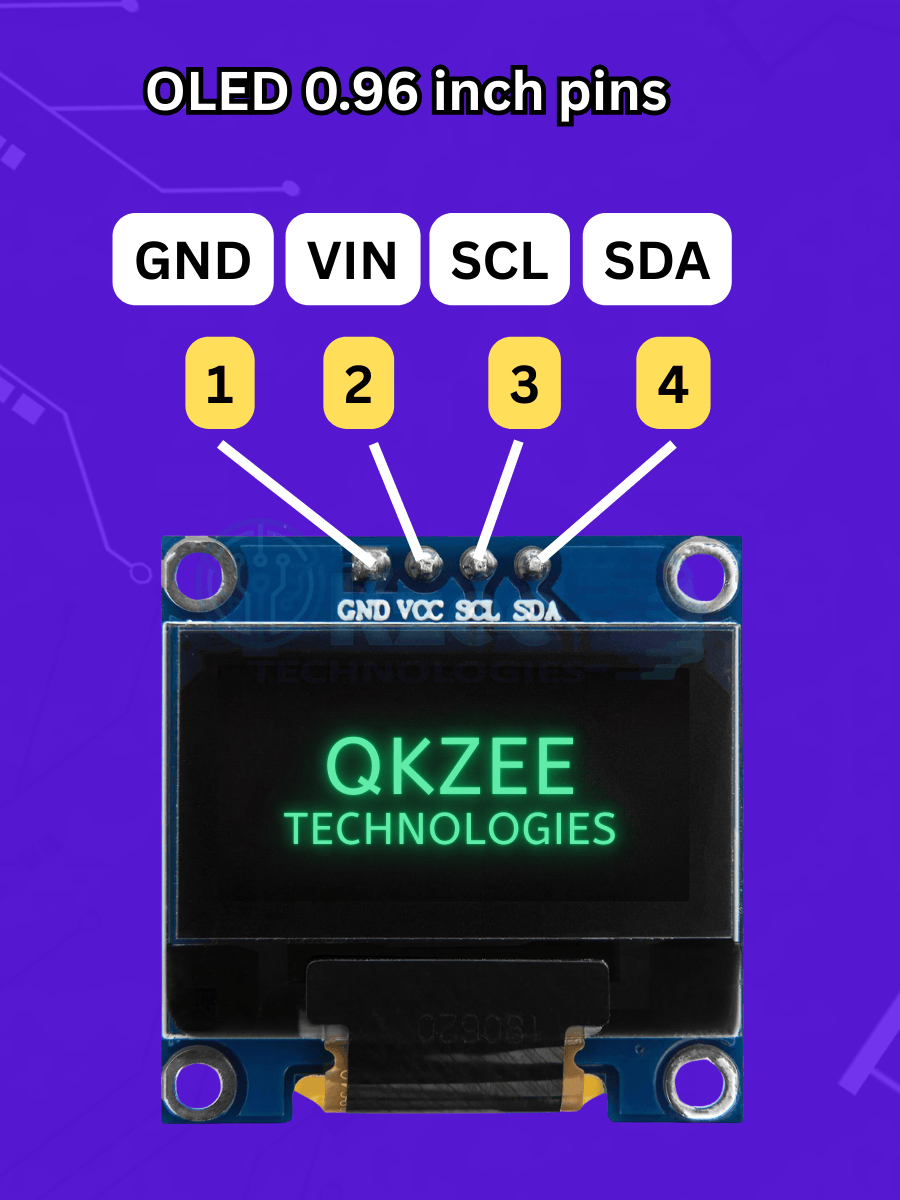
Connect the OLED to the Arduino:
VCC → 3.3V
GND → GND
SCL → A5
SDA → A4
Modify the code to include OLED display functions using the Adafruit libraries.
This visual representation makes the project more interactive and user-friendly.

12. Common Issues and Troubleshooting
Sensor Not Detected: Ensure correct wiring and that the sensor is powered.
No Readings: Check if the finger is properly placed on the sensor.
Erratic Readings: Ensure minimal movement during measurement and proper ambient lighting.
13. Enhancing the Project
Consider adding features like:
Data Logging: Store readings on an SD card.
Wireless Transmission: Send data via Bluetooth or Wi-Fi.
Mobile App Integration: Display data on a smartphone app.
These enhancements can make your project more robust and applicable in real-world scenarios.
14. Real-World Applications
Student Projects: Ideal for final year projects in engineering and medical fields.
DIY Health Monitors: Create personal health monitoring devices.
Educational Tools: Teach students about biosensors and data analysis.
15. Conclusion
Interfacing the MAX30102 Pulse Oximeter and Heart Rate Sensor with Arduino is a rewarding project that combines electronics, programming, and health monitoring. Whether you’re a student, hobbyist, or professional, this project offers valuable insights into biosensing and data analysis.
Where to Buy Your Electronics Components
Looking for affordable components for this Arduino project? Check out QKZee Technologies, an online shop in Lahore, Pakistan, offering the best components for students and DIY projects. Whether you’re looking for sensors, modules, or other electronics at a cheap price, they’ve got it all. Visit them at QKZeeTech.
Can I use a different transformer?
Yes, any transformer with 7-12V AC output will work (e.g., 220V to 12V)
Why not use a phone charger directly?
This project teaches power electronics fundamentals - great for learning!
How much current can this supply?
Up to 1A with proper heat sinking (less without heat sink)
Can I use this converter in my final year project or science project?
Definitely! This 12V to 5V converter is perfect for student projects, final year projects, DIY systems, Arduino automation, and school science projects. It's widely used in universities and technical colleges across Pakistan.
Where to buy components in Pakistan?
visit QKZee Technologies Hall Road Lahore, or contact QKZee Technologies for genuine parts and student-friendly prices


