How to Control DC Motor Speed with Arduino Using MOSFET 75nf75
Introduction
Complete Guide: How to Control DC Motor Speed with Arduino Using MOSFET 75NF75
Controlling DC motor speed with Arduino is a classic and useful project for students, hobbyists, and engineers alike. This guide explains how to interface a DC motor with Arduino using a powerful MOSFET (75NF75). Whether you are working on science projects, final year projects, or industrial automation, this method offers efficient control.
QKZee Technologies, your trusted engineering service in Lahore, highly recommends this project, which is commonly used in student projects at all Pakistani universities.

Components Required and Their Functions
Before diving into the wiring and code, here’s a breakdown of all the components used in this project:
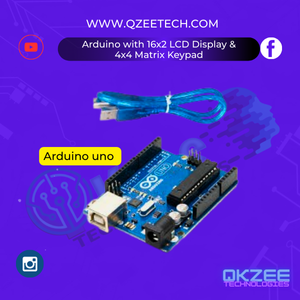
Arduino UNO
The brain of the project it sends PWM signals to the MOSFET to control the motor’s speed.
75NF75 MOSFET
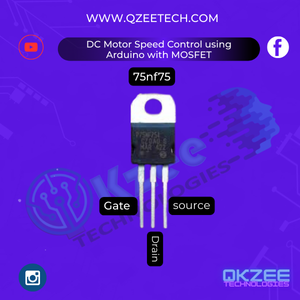
A high-power N-channel MOSFET is used to switch and control the current flowing to the motor efficiently.
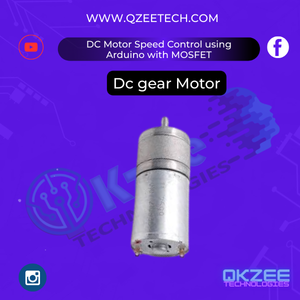
DC Gear Motor 12V
This is the load we’ll control. You can use any brushed DC motor depending on your application.
Power Supply (12V DC Adapter or Battery)
Used to power the DC motor. Make sure your supply can handle the motor’s current requirements.
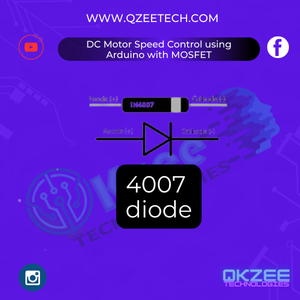
Flyback Diode 1N4007
Protects the MOSFET and Arduino from voltage spikes caused by the inductive motor load.
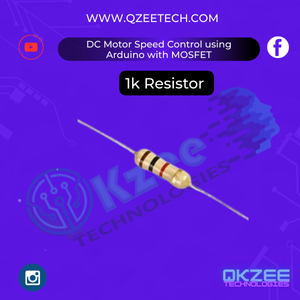
1kΩ Resistor
Used as a biasing resistor for the MOSFET Gate Triggering
10kΩ Resistor
Used as a pull-down resistor for the MOSFET gate to source to prevent false triggering.
Jumper Wires & Breadboard
For prototyping and making reliable temporary connections.

Wiring Setup: How to Connect Everything
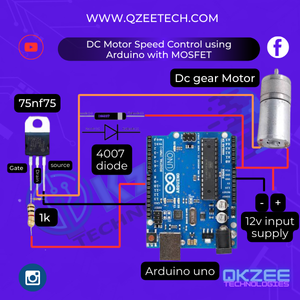
The wiring is simple and easy to understand:
Arduino to MOSFET Gate
Connect Arduino PWM pin (e.g., D9) to the Gate of the MOSFET through a 1kΩ resistor.
MOSFET Source
Connect the Source pin of the MOSFET directly to GND (negative terminal of the power source).
MOSFET Drain
Connect the Drain to one end of the DC motor.
DC Motor Other End
Connect the other terminal of the motor to the +12V power supply.
Flyback Diode
Connect in parallel with the motor terminals, cathode to +12V, anode to Drain/MOSFET side.
Code for Arduino – Speed Control Using PWM
Here’s a basic code to control the speed using the PWM signal:
int motorPin = 9; // PWM pin connected to MOSFET Gate

void setup() {
  pinMode(motorPin, OUTPUT);
}

void loop() {
  // Increase speed gradually
  for (int speed = 0; speed <= 255; speed++) {
    analogWrite(motorPin, speed);
    delay(20);
  }

  // Decrease speed gradually
  for (int speed = 255; speed >= 0; speed--) {
    analogWrite(motorPin, speed);
    delay(20);
  }
}
This code uses analogWrite() to generate PWM signals, effectively controlling the speed of the DC motor.
How It Works: Controlling Motor Speed with PWM & MOSFET
The Arduino doesn’t directly drive the motor because it can’t handle high current. Instead, it sends PWM signals to the MOSFET. The MOSFET works like a switch or valve — the wider the valve (duty cycle of PWM), the more current flows to the motor, thus controlling speed.
This method is highly efficient and keeps the Arduino safe from overload. The 75NF75 is perfect because of its high current and voltage capacity, making it ideal for final year projects, automation systems, and engineering projects.
Applications and Use Cases
Student projects and FYPs near Hall Road, Lahore
Automation systems for smart homes
Arduino-based robotics and DIY cars
Fan or pump speed control projects
Teaching aid for electronics and embedded systems
Safety Tips and Pro-Level Tricks
Use Flyback Diodes
Never skip the diode. It absorbs harmful back EMF from the motor.
Proper Heat Dissipation
MOSFETs can get hot. If driving large motors, use a heat sink.
Use External Power for Motors
Avoid powering motors from the Arduino board; always use a separate power supply.
Why Choose This Project?
This project is perfect for:
Students of all universities in Pakistan
Final year engineering projects
Robotics and automation learners
Anyone looking for easy but powerful Arduino projects
If you’re in Lahore and looking for engineering project help near Hall Road, visit QKZee Tech, run by Qasim Shahzad Lahore, for the best engineering service in Lahore.
Troubleshooting Common Issues
Motor not spinning?
Check power supply voltage
Ensure Gate voltage is high enough
MOSFET overheating?
Use heat sinks or choose a MOSFET with lower Rds(on)
PWM signal not working?
Double-check your code and pin configuration
Final Thoughts
Learning how to control a DC motor with Arduino using the 75NF75 MOSFET is an essential step in mastering embedded systems. It’s simple, effective, and opens up tons of opportunities in automation and robotics.
This project is highly recommended by QKZ Tech for students looking to learn real-world applications. It’s budget-friendly, easy to assemble, and perfect for beginner to intermediate engineers.
Where to Buy Your Electronics Components
Looking for affordable components for this Arduino project? Check out QKZee Technologies, an online shop in Lahore, Pakistan, offering the best components for students and DIY projects. Whether you’re looking for sensors, modules, or other electronics at a cheap price, they’ve got it all. Visit them at QKZeeTech.
Can I use any N-channel MOSFET instead of 75NF75
Yes, but ensure it has similar or better voltage and current ratings.
What is the use of a flyback diode in this circuit?
It protects your circuit from voltage spikes due to the motor’s inductance.
Can I use this setup for two motors?
Not directly; you’ll need two MOSFETs and more power handling capabilities.
Is this project suitable for university final year submissions?
Absolutely! Many FYP projects in Lahore and across Pakistan universities use this method.
Where can I buy these components in Lahore?
visit Hall Road Lahore, or contact QKZee Technologies for genuine parts and student-friendly prices


