Heart Rate Monitoring System
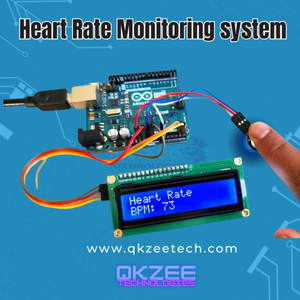
In this blog post, we’ll delve into the exciting world of heart rate monitoring using Arduino. By combining the power of Arduino microcontrollers with a heart rate sensor, we can create a simple yet effective system to track our heartbeats.
Components You’ll Need:
To build this system, you’ll need the following components:
- Arduino Uno: The brain of the system, controlling the sensors and processing data.
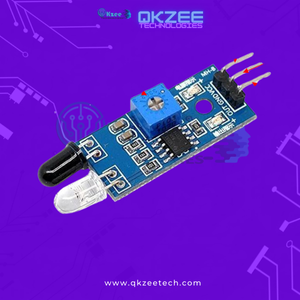
- Pulse Sensor: Detects the heartbeat through changes in light absorption in your skin.
- Jumper wires: for connecting the components.
- Breadboard: A platform for building the circuit without soldering.
- Resistors: To control the current in the circuit.
- LED: Optional, to visually indicate the heartbeats.
Step-by-Step Instructions:
Setup the Arduino and Pulse Sensor:
- Connect the pulse sensor’s VCC to the 5V pin on the Arduino.
- Connect the GND pin of the pulse sensor to the GND pin on the Arduino.
- Connect the Signal pin of the pulse sensor to the A0 pin on the Arduino.
Build the circuit on the breadboard:
- Place the Arduino and breadboard side by side.
- Use jumper wires to connect the components as per the schematic.
Write the Arduino Code:
- Utilize the Pulse Sensor Playground library to read data from the heart rate sensor.
- Process the data to calculate heart rate and display the results on a serial monitor or LCD.
Code Example:
					#include <PulseSensorPlayground.h>

PulseSensorPlayground pulseSensor;

void setup() {
  // Initialize the PulseSensor Playground library
  pulseSensor.begin();
}

void loop() {
  int heartRate = pulseSensor.getBeatsPerMinute();
  if (heartRate > 0) {
    Serial.print("Heart Rate: ");
    Serial.print(heartRate);
    Serial.println(" BPM");
  }
}console.log( 'Code is Poetry' );
Tips for Accurate Readings:
- Ensure a good connection between the heart rate sensor and your finger.
- Avoid excessive movement or pressure on the sensor.
- Experiment with different resistor values to optimize sensitivity.
Additional Features:
- Visualize Heart Rate: Use an LED or LCD to display the heart rate in real-time.
- Store Data: Log heart rate data to a file or send it to a remote server.
- Integrate with Other Sensors: Combine heart rate data with other physiological measurements (e.g., temperature, oxygen saturation).
Conclusion
By following these steps and leveraging the capabilities of Arduino, you can create a functional heart rate monitoring system. This project is a great starting point for exploring the world of wearable technology and healthcare applications.
Unleashing the Power of the L298N Motor Driver: A Beginner’s Guide to Motor Control
May 21, 2024
No Comments
Read More →


